
What Makes a Good Photo: A Beginners Guide to Editing in Lightroom
Daniel Nwabuko · Demystifying Photography x Videography
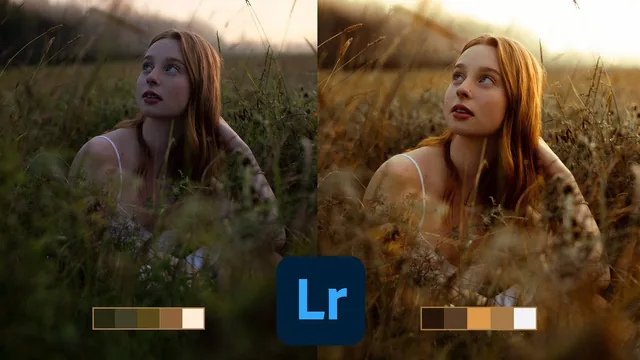
A working photographer walks a phone-only beginner through real light and a full Lightroom edit, not just theory.
This course opens with a definition, not a shortcut. Daniel Nwabuko spends the first quarter of the runtime on what actually makes a photo work before Lightroom ever gets opened, breaking "photography" down to its Greek roots (photon plus graphy, writing with light) to make the point that light is the variable everything else depends on. He proves it by walking around his own five-light video setup, switching his key light on and off so the viewer sees the difference between a lit and unlit face in real time. It is a simple demonstration, but an effective one, and it sets up the everyday-lighting lesson that follows, where he steps outside (weather intervenes, so he moves indoors) to make the case that a big soft light source, a window, beats a small bright one for anything but deliberately dramatic shadow work.
From theory to the sliders
The subject-isolation lesson is the strongest piece of the pre-editing material. Rather than just saying "make your subject stand out," Nwabuko names three concrete separation methods, light contrast, color contrast, and size or depth of field, and illustrates each with a different photo: a whiskey bottle lit by a shaft of light, a subject whose t-shirt color pops against an evenly lit wall, a tiny hiker dwarfed by sand dunes versus a portrait that fills the frame with a shallow depth of field. It is the closest thing in the course to a composition lesson, and it earns its runtime.
The editing block is where the course commits. Nwabuko works through three different raw photos on the desktop app, starting with the Basics panel: white balance, exposure, contrast, highlights, shadows, each explained by dragging the slider to its extreme so the effect is unmistakable before dialing it back to a usable value. One photo has a heavy green color cast from foliage reflecting onto skin, and watching him pull it back toward a warmer, more natural tone by adjusting tint and temperature together is a genuinely useful demonstration of diagnosing a color problem rather than just applying a preset. From there he moves into the HSL panel, isolating individual hues (reds, oranges, greens, blues) to desaturate or brighten just the colors that need it, and finishes with color grading, adding warm tones to shadows and contrasting cool tones to highlights for a filmic look.
Where it comes up short
The course is explicit that no camera is required, and the mobile Lightroom lesson backs that up, mirroring the same Light, Color, and Mix panels on a phone. That consistency is a genuine strength for a true beginner. But the tradeoff is depth: nothing here touches masking, local adjustments, presets, or noise reduction, and the export lesson is only a few minutes covering the dialog box. Several of the color-grading choices are also presented as pure personal taste ("I don't know why, it's just the way the color works for me") without much explanation of the underlying decision, which is honest but leaves a beginner without a repeatable rule to apply to their own photos. As a first pass at understanding light, subject, and basic color correction, it delivers what it promises. Anyone wanting a second course to build on it will need to look elsewhere.
The standout
The live before/after edits across three different raw photos, where color casts get diagnosed and corrected one HSL slider at a time in real time.
What you will learn
- How to spot and use big, soft light sources (like a window) instead of harsh direct light
- How to separate a subject from its background using light contrast, color contrast, and depth of field
- How to import and organize photos in Lightroom Desktop's Library module
- How to use the Basics panel (white balance, exposure, contrast, highlights, shadows) to correct a raw photo
- How to fine-tune individual colors with the HSL sliders and add mood with split-toning color grading
- How to replicate the entire desktop workflow inside the free Lightroom Mobile app
Best for: A total beginner with just a smartphone who wants to understand why a photo looks flat and how to fix it without buying software.
Skip it if: Anyone who already owns Lightroom and knows the Basics panel, or wants advanced masking, presets, or a business-focused workflow.