
Watercolor Portrait
Katie Krell · Artist, Designer, Animal Lover
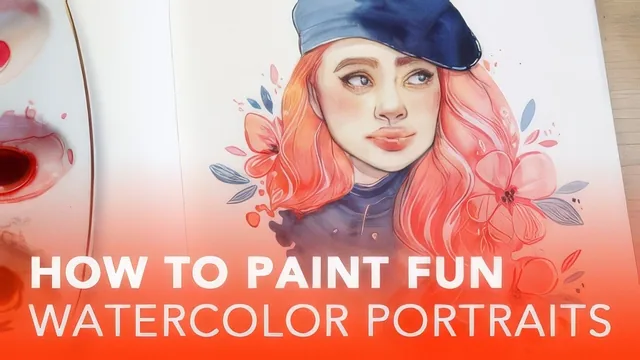
A 34-minute walkthrough of one artist's loose, sketchy watercolor process, light on fundamentals but rich in personal technique.
What it covers
This class walks through a single portrait from reference photo to finished piece in six short lessons. It opens with a materials rundown covering the teacher's Strathmore mixed-media sketchbook, a tin of travel watercolors organized with a hand-labeled swatch chart, a ceramic mixing palette, Dr. Ph. Martin's white ink for detailing, and a colored pencil chosen specifically because it erases cleanly, unlike graphite, which smears when water touches it. From there the course moves into proportion mapping, sketching and inking, watercolor application, and final detailing, following the same reference image throughout.
The proportion lesson is the structural core of the class. It shows how to draw a rough circle over a reference photo, add a center line that curves to match head tilt, and use a horizontal eye-line to locate where the corners of the eyes, edges of the nose, and corners of the mouth typically align. This is a genuinely useful piece of visual shorthand for anyone who has struggled to place features convincingly, even though it is presented as a quick personal habit rather than a rigorous anatomy lesson.
The sketching and inking lesson demonstrates a deliberately loose approach: light, moveable pencil lines that get erased and adjusted repeatedly before any ink goes down, followed by multiliner work that favors tapering dot-accents over uniform outlines to keep the linework feeling sketchy rather than polished. The watercolor lesson is the longest and most demonstrative section, covering wet-into-wet blending for skin tones, deliberate white-space reservation for highlights, purple as a shadow color, and a layered hair treatment that blends peach and orange tones with scattered floral motifs painted directly into the hair. The final lesson adds opaque white ink highlights and colored pencil touches to boost color saturation in the cheeks and lips.
Strengths and limitations
The course is honest about its own process, including a moment where the teacher shows an inking mistake made with a dip pen and explains how she worked around it rather than editing it out. That kind of transparency, paired with the specific material choices and the reasoning behind them, gives the class real texture as a case study in one artist's working method.
Where it falls short is depth. At 34 minutes across six lessons, several stages move quickly, and viewers without prior watercolor experience may find the paint-mixing and wet-into-wet control sections difficult to follow without pausing and rewatching. The class also does not spend much time on anatomy beyond the proportion guidelines, so it assumes a working knowledge of facial structure rather than teaching it from the ground up.
This is best understood as a process demonstration rather than a structured skill-building curriculum. Anyone hoping for detailed instruction on color theory, paint mixing ratios, or brush control will need to look elsewhere, but anyone who wants to see how an experienced illustrator actually thinks through a loose, expressive watercolor portrait, warts and all, will get real value from it.
The standout
The facial-proportion guideline method, mapping eye, nose, and mouth alignment with simple lines and shapes on a reference photo, gives portrait-shy artists a concrete fix for their most common failure point.
What you will learn
- How to map facial proportions onto a reference photo using guideline circles and cross-lines before sketching
- How to build a loose, erasable graphite sketch of a portrait using a colored pencil instead of standard graphite
- How to ink over a pencil sketch with a multiliner using accent strokes and dot-tapering rather than solid outlines
- How to lay wet-into-wet watercolor washes on skin tones while preserving paper-white highlights
- How to layer shadow tones, hair color gradients, and decorative elements like floral motifs into a portrait
- How to finish a piece with opaque white ink detailing and colored pencil accents
Best for: Artists who already have basic watercolor and sketching experience and want to study one illustrator's loose, expressive portrait workflow for inspiration.
Skip it if: True beginners with no drawing or watercolor experience, since the course moves quickly through fundamentals and assumes comfort with materials, mixing, and basic anatomy.