
Video Editing with Final Cut Pro X - From Beginner to YouTuber
Ali Abdaal · Doctor + YouTuber
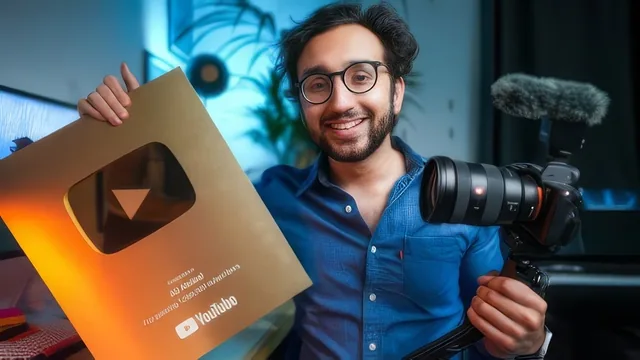
A doctor-turned-YouTuber walks through his exact three-part editing workflow, keyboard shortcuts and all, in real Final Cut Pro footage.
This is a workflow course, not a feature tour. Ali Abdaal, a doctor who built a YouTube channel editing his own videos, structures all 196 minutes around the same three-part process he uses on every upload: assemble the A-cut, add B-roll, then apply a final coat of polish. That structure is the course's biggest strength. Instead of a scattered list of Final Cut Pro tools, each lesson slots into a stage of a real edit, so a beginner finishes with a repeatable process rather than a pile of disconnected tricks.
The A-cut: where the real teaching happens
The early lessons cover library and event organization, then move into the mechanics of a rough cut: setting in and out points, appending clips to the timeline, and using the Q, W, and E keyboard shortcuts to place footage above, inside, or at the end of the main storyline. The most useful stretch of the whole course is the trim-and-tighten segment, where whole minutes are spent going clip by clip through a real recording, cutting pauses and stumbles with Alt-bracket ripple deletes. It is tedious to watch but it is exactly the skill a beginner needs, because tight pacing is what separates an amateur cut from a professional one, and no other lesson in the course does more to build that muscle.
A short but practical detour covers syncing externally recorded audio (from a Zoom recorder) with camera footage, either manually inside Final Cut or with the paid app Pluraleyes. It is a narrow use case, relevant only to anyone shooting with a separate microphone, but it is handled clearly and briefly enough not to bloat the course.
B-roll and polish
The middle section on B-roll is where the course earns its "YouTuber" framing. It covers full-screen title cards, lower thirds, static images animated with the Ken Burns effect, and screen recordings pulled in from an iPhone. The standout lesson here is the iPad hand-drawn animation: footage of handwriting is trimmed down to just the drawing motion using favorited in and out points, cropped to a black background, and then set to blend mode screen so the black disappears and the writing appears to draw itself directly onto the video. It is a genuinely clever technique explained with enough specificity that a beginner could reproduce it immediately.
The closing lessons on music, sound effects, and color grading are thinner. The color grading walkthrough amounts to adjusting a color curves preset on an adjustment layer and reusing it across every video, which is honest about being a personal shortcut rather than a rigorous grading education. Viewers hoping for scopes, secondary corrections, or a deeper look at color theory will not find it here.
Where it falls short
The course is unmistakably built around one person's specific setup and habits rather than general editing theory, which is both a strength and a limitation. Everything is demonstrated on a single real project, a monthly favorites video, so learners follow one continuous example rather than jumping between disconnected demos. But anyone who already understands keyboard shortcuts and basic layering will find the first third slow going, and the course never ventures into multicam editing, audio mixing beyond basic EQ and compression, or advanced motion graphics.
For a true beginner who wants to go from a blank Final Cut Pro window to a publishable YouTube video, this delivers exactly what it promises, taught by someone who was in that exact position two years earlier and still remembers what confused him.
The standout
The iPad hand-drawn animation technique, using favorited in/out points and blend mode screen to erase black backgrounds, turns a novelty effect into a repeatable, teachable process.
What you will learn
- How to organize footage into libraries and events before editing begins
- Assembling a tight A-cut using in/out points, append (E), insert (W), connect (Q), and ripple-delete trims
- Synchronizing externally recorded audio with camera video inside Final Cut Pro
- Layering B-roll: full-screen title cards, lower thirds, images with the Ken Burns effect, and screen recordings
- Building an iPad-drawn handwriting animation using blend mode screen and freeze frames
- A basic color grade workflow using an adjustment layer, color curves, and a saved LUT-style preset
Best for: A complete beginner who owns Final Cut Pro and wants to build a real YouTube-style video end to end, following one working editor's actual habits.
Skip it if: Anyone using Premiere Pro or DaVinci Resolve, or an editor who already knows keyboard shortcuts and basic B-roll layering and wants advanced color or multicam techniques.