
Procreate® Animation for Illustrators and Surface Designers: Make your Artwork Pop!
Sandra Mejia · Illustrator + Pattern Designer
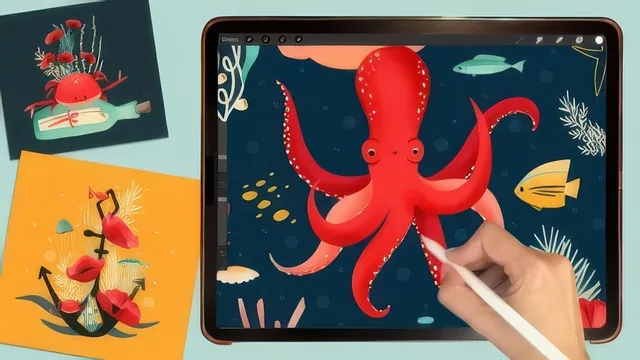
Six quick Procreate animation tricks in 44 minutes, built to turn static patterns and illustrations into shareable GIFs.
This is a narrow, practical class: not an animation theory course, but a demonstration of six ways to fake movement inside an app built for drawing, not motion. At 44 minutes across fourteen short lessons, it moves fast, and it assumes the viewer already has patterns or illustrations ready to animate. The opening sections cover the "why" (small file sizes, an easy way to stand out in a feed) before a short Procreate refresher and then a walkthrough of the Animation Assist panel itself, covering frame rate, onion skinning, and the three playback modes: one shot, loop, and ping-pong.
The six techniques, and how they hold up
The path-based fish animation is the simplest entry point: duplicate a group, nudge each element slightly, repeat. It is clearly a beginner-friendly technique, though the instructor's own tip about uneven spacing producing choppier motion in one section versus smooth motion in another is worth noting as a real technical constraint of the method, not just a stylistic aside.
The Transform tool section on blooming flowers exposes a genuine limitation of raster animation: since Procreate cannot scale up without pixelation, every growth animation has to be built backward, starting from the largest version and shrinking down through each frame. That is a useful, non-obvious detail for anyone new to raster-based motion work.
The Liquify section, using an octopus's tentacles as the example, is the most conceptually interesting: instead of redrawing anything, small pushes with a liquify brush create the illusion of continuous underwater movement across duplicated layers. It is presented as a shortcut for artists who do not want to hand-draw every frame, and it is the one technique that would be hardest to arrive at without seeing it demonstrated.
Frame-by-frame drawing and erase-based reveal animations round out the set, both using traditional forward-and-back layer duplication. Neither is groundbreaking on its own, but paired with the earlier techniques they round out a fairly complete toolkit for a working illustrator.
Where it succeeds and where it thins out
The class succeeds at being efficient. Every lesson ends with an export, so the loop from technique to finished GIF is always visible, and the export lesson itself, covering resolution tradeoffs, dithering, alpha threshold, and file size, is more thorough than most short classes bother to be. The bonus lesson on screen-recording a GIF to work around Instagram's video length restrictions is a small but genuinely handy inclusion.
Where it falls short is depth. Each technique gets one demonstration and no variation, so there is little room to see how these methods handle more complex artwork or multiple moving elements at once. There is also no real discussion of animation principles like timing, easing, or anticipation. This is fine given the stated scope, a quick toolkit rather than an animation fundamentals course, but viewers hoping to develop a more expressive animation sense elsewhere will need to look further afield. As a fast, complete pass through Procreate's animation features for someone who already draws, it delivers exactly what it promises.
The standout
The colorshift-with-transparency lesson, which staggers layer opacity in 25 percent increments to blend between pattern colorways, a technique directly useful for surface designers pitching collections.
What you will learn
- Setting up Procreate's Animation Assist panel: frame rate, onion skinning, foreground/background locking, and loop versus ping-pong playback
- Animating along a path by duplicating and repositioning grouped layers (the swimming fish exercise)
- Growing or shrinking elements smoothly with the Transform tool despite Procreate's raster limitations
- Using the Liquify tool's Push function to add subtle floating motion without redrawing artwork
- Frame-by-frame redrawing for facial expression changes, plus erasing layers to reveal text letter by letter
- Exporting GIFs with correct resolution, alpha threshold, and transparency settings for web, shop listings, and Instagram
Best for: Illustrators and pattern designers who already have finished artwork and want fast, low-effort ways to turn it into shareable motion for shops or social feeds.
Skip it if: Anyone wanting real animation principles like easing, timing curves, or character rigging, or anyone without existing Procreate illustration skills to animate.