
Procreate and Real Watercolors: Combining Hand Painting with Digital
Brooke Glaser · Illustrator
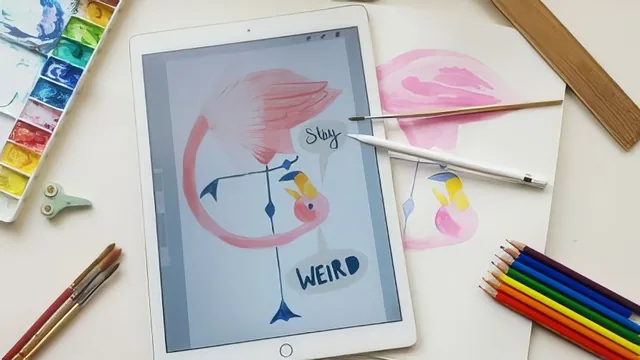
A focused workflow for scanning watercolor paintings into Procreate and blending them with digital details, not a painting or Procreate basics class.
This course is not about learning to paint, and it is not a Procreate fundamentals class either. It sits in a narrower lane: how to get a physical watercolor painting out of the real world and into a digital file where it can be cleaned up, recolored, and combined with digitally drawn elements. That narrow scope is both the course's strength and its limiting factor.
The structure follows the actual production pipeline in order, which makes it easy to follow even though the lessons are short. It opens with painting-stage advice, things to do before a brush ever touches water, like using watercolor pencils in matching colors so pencil sketch lines melt into the paint instead of leaving hard outlines to erase later. It then moves through scanning settings, file transfer between computer and iPad, and two competing methods for stripping out the white background paper. From there it covers aligning a scan under a sketch, blending digital details on top of the paint using layer blend modes, and finally a masking technique for dropping scanned watercolor texture into digital shapes.
What actually gets taught
The background-removal lessons are the meat of the course, and they are taught twice: once in Procreate using layer masks and selection thresholds, and once in Photoshop using the Magic Wand, Quick Selection tool, and a selection-smoothing trick to clean up stray pixels. Showing both is a smart choice, since not every viewer owns Photoshop, but it also means the course spends real time on two versions of the same task rather than going deeper into new territory.
The iPad-as-lightbox segment is the most inventive lesson, walking through practical fixes like maxing out screen brightness, inverting sketch colors for contrast, and using Procreate's snap-to-canvas gesture so a traced sketch lines up pixel-for-pixel with the digital file later. The alignment lesson that follows is genuinely useful and non-obvious: using corner nodes in the Transform tool one at a time, rather than scaling the whole image at once, to avoid repeated pixelation.
The blend-mode section, where Multiply, Screen, and Linear Burn are used to add shading and highlights that read as part of the original paint texture rather than as flat digital additions, is where the "combining" promise of the title is best delivered. The closing masking lesson, which drops a scanned watercolor texture into a shape using a mask and then repositions the texture underneath with the Transform tool, reinforces the same layer logic taught earlier but applies it to texture rather than background removal.
Where it falls short
At 66 minutes across 12 lessons, several segments run under five minutes, and the course leans on the viewer already knowing basic Procreate layer and selection mechanics. Total beginners to Procreate will find some steps assumed rather than explained. The course also requires real overhead to practice along with it: a scanner, an iPad with Procreate, and ideally Photoshop, which raises the barrier to actually doing the class project rather than just watching it.
Despite the narrow scope, the course delivers exactly what its title promises, a concrete pipeline for merging painting and digital art, and does so without padding or repetition beyond the two background-removal methods. For the specific audience of illustrators already juggling both mediums, it fills a real gap that broader Procreate classes tend to skip.
The standout
The layer-masking method for removing background paper in Procreate, which lets the artist erase or restore edges with adjustable brush hardness instead of committing to a single destructive selection.
What you will learn
- How to prepare a watercolor painting (paint darker than the background paper, avoid pencil sketch lines, use watercolor pencils to hide sketch marks) so it scans and separates cleanly
- Correct scanner settings (color mode, 300+ DPI, TIFF format) and file transfer between computer and iPad via Dropbox or AirDrop
- Two separate ways to strip the white background from a scan, using layer masks and selection tools in Procreate, and using the Magic Wand and Quick Selection tool in Photoshop
- Using an iPad as a backlit lightbox to trace sketches directly onto watercolor paper for near-perfect alignment
- Aligning a scanned painting under a digital sketch using Procreate's Transform tool without cropping or distorting the artwork
- Blending digital details into painted textures using Multiply, Screen, and Linear Burn blend modes, plus masking a scanned watercolor texture into a shape
Best for: Illustrators or designers who already paint traditionally and use Procreate, and want a repeatable pipeline for merging scanned artwork with digital linework.
Skip it if: Beginners looking to learn watercolor painting itself, basic Procreate navigation, or anyone without access to a scanner and either Procreate or Photoshop.