
Photography for Instagram: Capture and Share Your Life
Hannah Argyle · Photographer, Content Creator, Mum
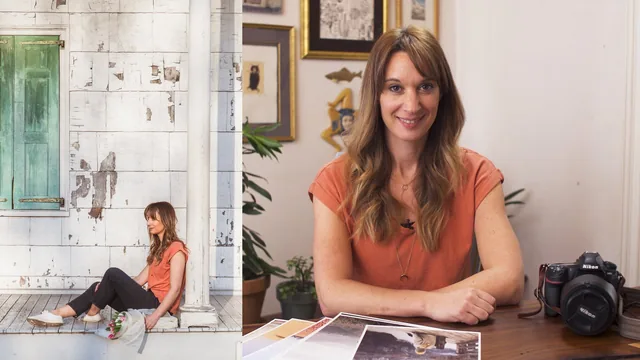
A UK photographer with no glamorous scenery teaches you to stage self-portraits with a timer and edit them into a cohesive Instagram feed.
A modest premise, honestly delivered
Hannah Argyle opens by rejecting the idea that a good Instagram feed requires exotic locations. She lives in an unglamorous UK town and builds her photography around small, local scenes: a foggy park path, a stack of hay bales, a house with mint-green shutters. That framing sets the tone for the whole class. Rather than promising a dramatic transformation, it promises a workable process anyone can repeat in their own unremarkable surroundings, and it mostly delivers on that narrower, more honest goal.
The manual-mode lesson is the technical backbone, and it earns its place. Argyle explains ISO, aperture and shutter speed not as an abstract exposure triangle but through concrete tradeoffs: keep ISO low for quality but watch that shutter speed doesn't drop into blur territory, prioritize shutter speed over ISO when photographing children or anyone moving, and deliberately raise the F-stop when shooting yourself on a timer because you can't fine-tune your exact position the way you could with a live subject in front of the lens. That last point, using a narrower aperture as a safety margin for self-portraits, is the most transferable idea in the class. It is specific, non-obvious, and solves a real problem beginners run into the first time they try a solo timer shot.
Where the class thins out
The self-portrait walkthrough in the park is where the course is most concrete: focusing on a fixed object like a pillar or a hat before walking into frame, taking nine-shot bursts on a timer, and adjusting pose and angle based on what looks stiff versus natural on review. The hero-shot selection segment that follows is less a teachable method than a running commentary on Argyle's own preferences, useful mainly for showing how many near-identical frames a single setup can produce before one stands out.
The two editing lessons are the most detailed part of the course and will be the most useful section for anyone who already has Lightroom open. Profile correction, perspective straightening, crop to 4:5, exposure and highlight balancing, then targeted color and luminance work on isolated elements like a shutter or a t-shirt using the auto-mask brush tool: this is a real, replicable workflow, not a vague gesture at "editing." The tradeoff is that it assumes familiarity with Lightroom's interface. Someone opening the software for the first time will need to pause and orient themselves repeatedly, since the class explains what each adjustment achieves but not always where to find it.
The course's stated promise that phone photographers get equal value is only partly true. The composition and posing advice does translate, but the manual-mode and Lightroom sections, which together make up more than half the runtime, assume a camera with physical exposure controls and desktop editing software. Viewers shooting exclusively on a phone with Instagram's built-in tools will find real value in the self-portrait and gallery-planning sections but will have to translate the rest themselves.
At under an hour, the class doesn't overstay its welcome. It teaches one photographer's specific, repeatable system rather than general theory, which makes it easy to follow but also means its value depends on how closely a viewer's setup matches Argyle's own DSLR-plus-Lightroom workflow.
The standout
Setting a deliberately higher F-stop (F7 rather than a lens's widest aperture) as insurance against being slightly out of position when shooting yourself on a timer.
What you will learn
- How to balance ISO, aperture and shutter speed in manual mode, and which setting to prioritize for moving subjects versus self-portraits
- How to compose and shoot self-portraits using a camera timer, pre-focusing on a fixed point, and framing for a 4:5 Instagram crop
- How to select a hero shot from a batch of near-identical takes based on composition, expression and light
- How to run a Lightroom edit pass: profile correction, perspective and crop, exposure and highlight recovery, and localized color/saturation adjustments with masks
- How to use brush masks in Lightroom to treat one part of an image (a shutter, a t-shirt, a figure) separately from the rest
- How to preview a finished shot against an existing Instagram grid using a layout-planning app before posting
Best for: Beginner-to-intermediate hobbyist photographers who already own a camera with manual controls and want a repeatable process for self-portraits and Instagram-ready edits.
Skip it if: Complete beginners with no camera or Lightroom access, or anyone hoping for phone-only shooting and editing instruction beyond a passing mention.