
Photo Editing in Adobe Photoshop Lightroom: A Beginner's Guide
Tabitha Park · Product & Food Photographer
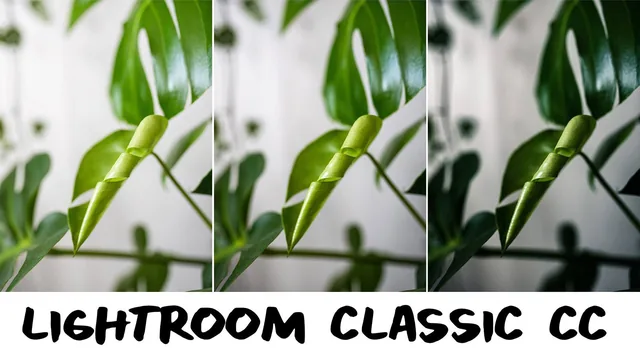
A Skillshare-native intro to Lightroom Classic taught by a working product photographer, more workflow diary than structured tutorial.
Tabitha Park's beginner Lightroom course is built less like a curriculum and more like a photographer thinking out loud while she works, which is both its charm and its main limitation. Across ten lessons and just under two hours, she walks through her personal system for managing catalogs, culling shoots, editing photos, and exporting them, using her own product and lifestyle photography as the working examples throughout.
Structure and pacing
The course opens with catalogs, a topic most beginner tutorials skip entirely. Park explains why she keeps several catalogs instead of one giant archive (performance, mostly, plus the annoyance of scrolling through years of old shoots), then walks through her actual folder structure on an external drive named "Tab," including a catalog she admits ballooned to 2.28 gigabytes before she learned better habits. It's a useful real-world cautionary tale, but it runs long and leans heavily on her specific file names and drive setup rather than general principles a viewer can map onto their own machine.
The importing, culling, and Develop sections that follow are the strongest stretch. She shows a concrete one-star-then-two-star culling pass, explains how she deletes rejects from disk versus just removing them from Lightroom, and then moves into the Develop module with a real edit: pulling up exposure and contrast, adjusting highlights and shadows, using the white balance eyedropper on a neutral gray area, and pushing the same photo toward either a "light and airy" or "dark and moody" result. Watching one image get pushed two different directions is a genuinely useful demonstration of how much range the basic sliders offer before any plugin or preset gets involved.
Retouching, presets, and export
The cloning and brushing lesson covers the spot healing tool for blemish removal, including a specific example of adjusting the tool's opacity to soften a mark rather than erase it entirely, which is a more nuanced technique than most beginner tutorials bother with. The graduated and radial filters get similarly concrete treatment, darkening a blown-out sky and isolating a subject's face for extra sharpening.
The presets lesson is where the course shows its personality most, with Park giving her honest opinions on paid preset packs from other photographers and educators before demonstrating how to build a preset from scratch, deliberately excluding exposure and white balance so it survives a jump to differently lit photos. It's a smart, specific piece of advice that a lot of preset tutorials never mention.
Where it falls short
The course's biggest issue is that it was recorded on Lightroom Classic CC 7.5 from 2018, and enough of the interface, panel layout, and preset file format has changed since that a beginner following along on a current version will hit mismatches. The pacing is also uneven: catalog management and personal backup habits get nearly twenty minutes, while the Map, Book, Slideshow, and Print modules are waved off in a sentence each. Nothing here is deceptive, and Park is upfront that she doesn't use those panels, but a viewer paying for a complete beginner's guide may notice the imbalance.
As a low-pressure, personality-driven tour of one photographer's actual workflow, it succeeds. As a precise, up-to-date reference for every tool in the Lightroom toolbox, it does not.
The standout
The side-by-side walkthrough of building a custom preset from a single edited photo, deliberately leaving exposure, temperature, and tint untouched so it transfers cleanly to different lighting setups.
What you will learn
- How to structure and maintain Lightroom catalogs, back them up, and archive files to external drives
- How to import photos, apply keywords, and cull a shoot using star ratings and color labels
- How to use the core Develop panel sliders (exposure, tone curve, HSL, white balance) to build a light-and-airy or dark-and-moody edit
- How to use the spot removal, graduated filter, radial filter, and adjustment brush tools for targeted retouching
- How to create, import, and share custom Lightroom presets, including a black-and-white preset
- How to set export presets for Instagram, full-resolution delivery, and round-tripping into Photoshop
Best for: A total Lightroom novice who wants to see one working photographer's real end-to-end catalog-to-export workflow rather than a menu-by-menu feature reference.
Skip it if: Anyone who has already used Lightroom for a year or more, or who wants a tightly scripted, jargon-precise walkthrough of every panel in order.