
Pet Portraits: Capture Studio-Quality Photos of Your Pet
Tabitha Park · Product & Food Photographer
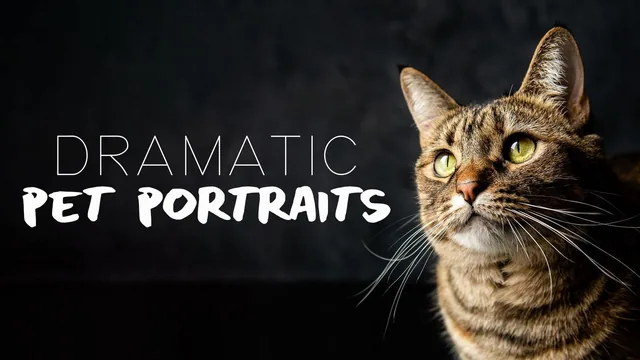
An experienced pet or product photographer with a DSLR and a window can learn a genuinely repeatable dramatic lighting setup in under an hour.
Tabitha Park's "Pet Portraits" is a tightly scoped, single-technique class: one window, one dark backdrop, and a side-lighting setup applied across three different animals in two homes. At 56 minutes split into eight short lessons, it moves fast, and that pace is both its strength and its main limitation.
What the course actually teaches
The core lesson is lighting, not posing or gear acquisition. Park uses a west-facing window diffused by an ordinary curtain, then fine-tunes the beam by tilting her backdrop slightly off-square and pulling the curtains in a few inches at a time until the light drags across the subject rather than flooding it. This is demonstrated with a stand-in stack of books before any animal enters the frame, which is a sensible teaching choice: viewers get to see the mechanics of the light in isolation before watching it get complicated by a moving cat.
Camera settings get real specificity rather than vague advice. Park walks through her actual numbers, a Nikon D750 at roughly 1/200s, f/4 to f/5, and ISO in the 320 to 1000 range depending on the animal and the light, and explains why the choices shift with the subject's face shape. A dog with a long snout needs a narrower aperture to keep the whole nose in focus, while a flat-faced cat allows for a wider aperture and more background blur. That reasoning is the kind of transferable judgment call that separates a real technique from a settings cheat sheet.
The backdrop-building segment is a practical bonus. Park shows, in time-lapse, how she converts a two-by-four-foot piece of underlayment into a matte black backdrop using chalkboard paint and a mini roller, solving the problem of her original board being too small for a full-size dog.
The editing lesson, done in Lightroom Classic, is the longest and most detailed section. It covers lens correction, cropping for negative space around the subject's eyes, contrast and tone-curve adjustments, hand-painted burning of the background with an adjustment brush, spot removal to erase a visible seam between two backdrop pieces, and a graduated filter to darken corners. It is a genuinely useful before-and-after workflow, though it moves quickly enough that pausing and rewinding is more or less required to replicate each step.
Where it holds up and where it doesn't
The class delivers on its narrow promise. Watching the same lighting principle applied to a skittish cat, a calm dog, and a second more anxious cat in a different house makes the technique feel field-tested rather than staged once for the camera. Park is also candid about failure, noting when a shot didn't come together and what she'd change next time, which is more honest than most photography tutorials manage.
The gaps are mostly about depth. There is no real discussion of alternative lighting setups if a window isn't available, no troubleshooting section for common problems like blown-out fur or motion blur beyond the settings already given, and the mobile-editing portion at the end feels like an afterthought bolted onto a Lightroom-heavy lesson. Beginners without existing manual-mode fluency will likely need to pause and look up terms the class assumes are already understood. For anyone who already shoots manual and wants one solid, repeatable lighting recipe rather than a broad photography education, it delivers exactly that in under an hour.
The standout
The side-lighting demonstration in the setup lesson, where subtle curtain adjustments and a tilted background turn flat light into a dramatic beam across the subject, is the technique that makes the rest of the class worth following.
What you will learn
- How to build side lighting with window light and curtain angling to control contrast and drama
- How to select camera settings (aperture, shutter speed, ISO) based on a pet's face shape and movement speed
- How to build a large matte-black painted backdrop from underlayment and chalkboard paint
- Techniques for keeping a cat or dog engaged using treats, toys, and a helper during a session
- How to crop, dodge and burn, and hand-paint backgrounds in Lightroom Classic for a high-contrast studio look
- How to shoot and edit with a smartphone and clip-on telephoto lens as an alternative to a DSLR
Best for: Hobbyist or semi-pro photographers who already own a DSLR or capable smartphone and want a specific, reproducible at-home lighting recipe for pet portraits.
Skip it if: Absolute beginners who don't yet understand aperture, shutter speed, and ISO, since the class assumes manual mode fluency and moves through settings quickly.