
Painting a Watercolor Poppy : explore 3 watercolor styles
Irina Trzaskos · Watercolor Artist & Illustrator
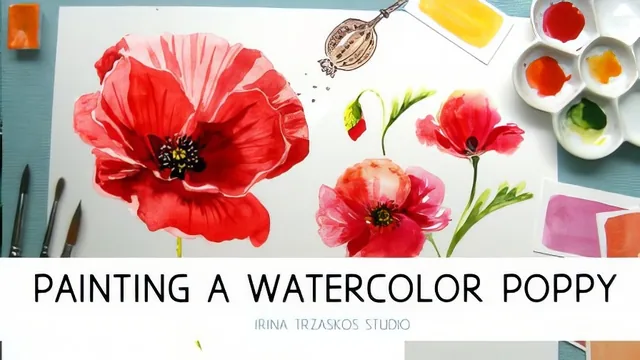
A 75-minute crash course walking through three distinct poppy techniques, useful mainly if you already hold a brush with confidence.
What the course actually covers
"Painting a Watercolor Poppy" is built around a simple structural idea: teach one flower through three different rendering approaches so students can see how style changes outcome even when the subject is identical. After a brief supplies rundown covering paper, brushes numbered two through twelve, a fine liner, and a two-cup water setup, the class opens with a study section where the poppy is broken into parts: the central capsule, four petals, stamens, and the fluffy stem and seed pod. This groundwork pays off later, since the same vocabulary of shapes gets reused across all three painting demonstrations.
The color-mixing lesson is denser than it first appears. Rather than handing over a fixed palette, it walks through how petal color shifts from a watery cadmium yellow or scarlet red at the tip to a more pigmented, cooler mix near the base, often cut with a complementary color like green or purple to keep the hue from looking flat. This push-pull between watery highlights and pigment-heavy shadow becomes the throughline for every technique that follows.
The three styles, and how they differ
The loose painterly poppy is the fastest and most forgiving: wet paper, dropped-in color, and instinctive brush pressure to shape petal edges, all completed without an underlying pencil sketch. It leans on watercolor's own blooming and blending, letting yellow bleed into red mid-flower for a soft gradient effect. This section moves quickly and assumes some comfort with unpredictable wet-on-wet paint behavior.
The realistic poppy is the most disciplined of the three and the strongest section of the course. It is built in distinct layers, a light overall wash first, then shadow shapes added once that layer is fully dry, then fine texture lines and dark spot details added last. The instruction to identify a light source and consistently darken petals closer to the flower's center and away from the light is a genuinely useful principle that extends past this one flower.
The pen-and-watercolor poppy trades precision for charm, using a waterproof fine liner to establish the drawing first, then adding loose, incomplete color washes that deliberately leave white paper showing. A small bumblebee is added as a compositional extra, and the final pass returns with liner and white gel pen to add stamens and highlights.
Where it succeeds and where it thins out
The course's biggest strength is contrast: seeing the same subject rendered fast-and-loose, then slow-and-layered, then graphic-and-illustrative makes the differences between techniques concrete rather than abstract. The realistic layering method in particular is taught with enough specificity about wet versus dry timing and pigment ratios that a student could reasonably reproduce it.
The weaknesses are mostly ones of pacing and depth. At 75 minutes for three full paintings, each style gets compressed, and foundational skills like basic color theory or brush control are referenced rather than built from zero. Verbal instruction sometimes outruns what is easy to follow without pausing and rewinding, and a few color names are mentioned only once before moving on. Students with zero watercolor background will likely need a separate beginner class first, a gap the course itself seems to anticipate by pointing toward the instructor's more foundational classes elsewhere.
The standout
The layered realistic poppy demonstration, where light and dark values are built glaze by glaze with drying time between layers, teaches a transferable value-building method beyond just poppies.
What you will learn
- How to break down a poppy's structure (capsule, four petals, stamens, seed pod) through quick reference sketches
- How to mix watery, translucent watercolor washes for yellow, scarlet, carmine, and peach poppy variations
- How to paint a loose, wet-on-wet poppy that relies on flowing pigment and minimal control
- How to build a realistic poppy through layered glazes, letting each wash dry before adding shadow
- How to combine waterproof fine liner with watercolor washes for an illustrative, mixed-media poppy
- How to mix natural-looking greens and shadow tones for stems, leaves, and seed pods
Best for: Beginner-to-intermediate watercolorists who already know basic washes and want a focused, style-comparison project on a single flower.
Skip it if: Absolute beginners with no prior brush or paint-mixing experience, since color mixing and wet-on-wet control are assumed rather than taught from scratch.