
Master iPad Lettering with Procreate: Pro Techniques for Artists
Molly Suber Thorpe · Calligrapher & Designer
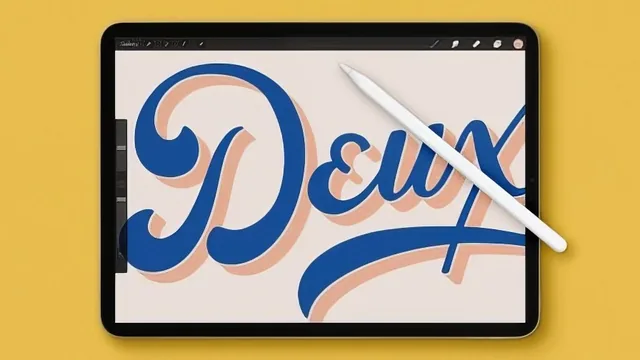
A well-organized, technique-dense Procreate lettering course that rewards viewers who already know basic hand lettering but move fast past total beginners.
A software tour first, a lettering class second
Molly Suber Thorpe's course opens with what amounts to a Procreate 4 orientation: the gallery interface, stack management, canvas creation at proper DPI, and a full walk through the settings wrench, magic wand adjustments, selection tools, and layers palette. This is thorough to the point of being almost a reference manual, covering alpha lock, layer grouping, blending modes, and the color picker in enough depth that a total software novice could follow along. For anyone who has used Procreate even casually, though, this opening stretch runs long. The course does not really get into lettering-specific work until several lessons in, which means the title's promise of "iPad lettering" takes a while to arrive.
Once it does arrive, the substance improves considerably. The lettering essentials lesson covers drawing baselines, writing with pressure-sensitive brushes, and a clever trick where Procreate's color-drop threshold lets you recolor a single connected stroke of ink without duplicating layers, useful but limited enough that the instructor is honest about when it fails and recommends separating overlapping words onto distinct layers instead. That kind of practical caveat, telling you where a shortcut breaks down rather than only where it shines, runs through the rest of the course and is one of its better qualities.
Where the techniques earn their keep
The effects lessons are the strongest material here. Ombre lettering gets demonstrated with a scraping-nozzle brush and layered hue shifts rather than a single gradient tool, giving a textured, hand-painted look instead of a flat digital blend. The watercolor lesson goes further, duplicating and renaming a customized brush, tuning its pressure-to-size curve, reducing opacity mid-stroke to mimic a brush running dry, then following up with a matched smudge tool and a Gaussian blur on a duplicated layer to fake bleeding paper edges. It is a genuinely useful sequence because it explains the reasoning behind each setting rather than just clicking through a preset.
Shading, drop shadows, and highlights follow a similar hand-built philosophy: dimension is added by hand-drawing shadow shapes and lightening or darkening them, not by applying a filter. The masking lesson, new to Procreate 4 at the time, is presented as a non-destructive alternative to erasing and gets a clear explanation of how mask thumbnails link to their parent layer.
The bonus material carries real weight
The three bonus videos on custom brush-building, color palette extraction from a photo, and copy-paste tricks for dividing layers are not throwaway extras. Building a brush from a shape source and a grain source, then adjusting grain behavior from rolling to stamped, is a legitimately advanced skill many lettering tutorials skip entirely.
The tradeoff is pacing. Beginners get a long software primer before any lettering happens, while the effects lessons assume comfort with layers and brush settings that the primer only just established. The free guide sheets and background textures included as downloads are a nice practical addition, but this is best suited to someone who can already write good letterforms and wants Procreate-specific finishing skills, not someone starting from a blank page.
The standout
The watercolor brush customization lesson, which walks through specific streamline, taper, azimuth, and pencil-pressure settings to turn a stock Procreate brush into a convincing hand-lettering tool and pairs it with an opacity-fading and smudge-based bleeding-edge technique.
What you will learn
- Navigate the Procreate 4 gallery, canvas, layers, and brush menus, including alpha lock, masking, and blending modes
- Import brushes and background images using iOS 11's split-screen Files app
- Build ombre and watercolor lettering effects, including customizing a default watercolor brush's streamline, taper, and pressure settings
- Add dimension through hand-drawn drop shadows, internal shading, and highlight tricks like the white outline stack
- Recolor and texture work using hue/saturation, color balance, noise, and Gaussian blur adjustment layers
- Build a fully custom brush from scratch by combining a shape source and grain source, and set up custom color palettes from a photo
Best for: Someone who already hand letters on paper or digitally and wants to translate that skill to Procreate with professional finishing techniques like shading, masking, and custom brushes.
Skip it if: A complete beginner to hand lettering itself, since the course assumes baseline letterform and composition skills and spends its time on software technique rather than lettering fundamentals.