
Intro to Procreate: Illustrating on the iPad
Brooke Glaser · Illustrator
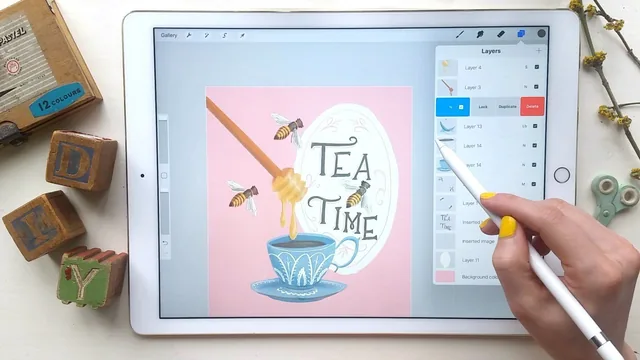
A genuinely thorough tour of Procreate's interface that will save hours of trial and error, though it teaches the tool, not how to draw.
This course sets out to do one specific thing: make every button, gesture, and hidden menu in Procreate make sense. It succeeds at that narrower goal more completely than most app-tutorial courses manage, working lesson by lesson through canvas creation, the gallery, brushes, layers, selections, recoloring, transforms, drawing assistance, masks, text, accessibility settings, and file import/export.
Structure and depth
The course opens with the practical groundwork: canvas dimensions, DPI (300 for print), and the RGB versus CMYK choice, tied directly to the number of layers a canvas will support. That layer-limit tradeoff resurfaces later when the layers lesson explains grouping and merging as ways to work around a hard ceiling rather than as optional tidiness. This kind of connective thread between lessons is where the course earns its credibility. It is not a list of disconnected feature demos.
The reference-image lesson stands out for going three levels deep: split-screen browsing another app, inserting a photo directly onto the canvas, and the reference companion floating window that lets an artist zoom into fine detail while keeping the full image visible. The private-photo-insert option, which hides a traced reference from the automatically recorded timelapse, is a genuinely useful and non-obvious workaround that shows real production experience rather than surface-level app knowledge.
The recoloring section is similarly hands-on, walking through ColorDrop, ReColor, and color-fill-with-selection as three distinct tools with different threshold behaviors, rather than treating them as interchangeable. The drawing-assistance lesson on QuickShape, perspective grids, and symmetry mode covers a genuinely useful set of shortcuts for anyone building geometric or mirrored artwork, and the warning about resizing artwork losing quality through interpolation choices (nearest neighbor, bilinear, bicubic) is a detail many tutorials skip entirely.
Where it falls short
The course is unapologetically about the app, not about art. The final project asks students to name a favorite Procreate feature rather than produce a piece of work, and the closing lesson pivots directly into a pitch for the instructor's separate drawing course. Anyone expecting to come away with stronger fundamentals in shading, proportion, or composition will need that second course, since this one covers none of it.
There is also a fair amount of promotional material woven through the lessons themselves: repeated mentions of a bonus resource page requiring an email signup, a newsletter pitch, and a giveaway lesson that exists purely to drive engagement. None of this actively harms the technical content, but it does pad the runtime and interrupts the tutorial flow.
Production-wise, the course has clearly been updated over several years to track Procreate's changes, which is a genuine strength since app tutorials go stale quickly. The tradeoff is occasional inconsistency in footage and slightly uneven pacing between lessons, with some running long on tangents about interface preferences.
Overall, this is a legitimate reference for getting comfortable inside Procreate quickly, best watched with the app open and followed along in real time rather than passively.
The standout
The private-photo-insert trick for tracing reference images without exposing the trace in a shared timelapse video is a genuinely clever, non-obvious workflow most tutorials never mention.
What you will learn
- Setting up a canvas correctly for print (DPI, color profile) versus screen work, and understanding the layer-limit tradeoff that comes with canvas size
- Using all three reference-image methods, including private layers that hide traced photos from a recorded timelapse
- Managing layers efficiently: grouping, merging, moving multiple layers at once, and avoiding the accidental-crop trap when transforming off-canvas
- Recoloring finished art with ColorDrop, ReColor, and color threshold controls instead of manually repainting sections
- Using QuickShape, drawing guides, and symmetry mode to draw clean geometric and mirrored artwork
- Exporting a timelapse video and sharing finished art via AirDrop, cloud services, or as a layered PDF/PSD
Best for: Someone who already owns an iPad and wants a thorough, feature-by-feature map of Procreate before starting original illustration work.
Skip it if: Anyone looking to learn how to draw, sketch, or shade convincingly, since the course explicitly defers that skill to a separate class.