
Fundamentals of DSLR Photography
Photo Essentials x Justin Bridges
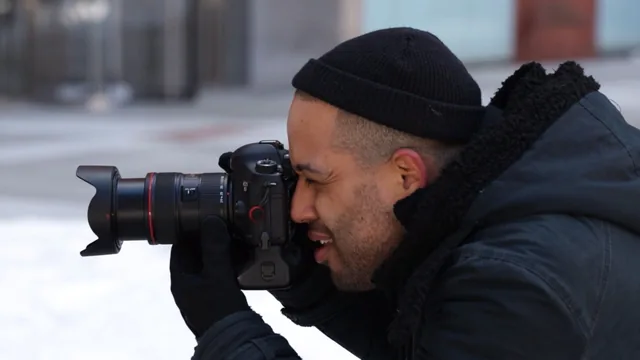
A working fashion photographer walks total beginners through exposure, then proves it on the street with an actual moving fan and a bicycle pan shot.
Fundamentals of DSLR Photography is exactly what its title promises: a compact, no-frills primer on the one thing every beginner actually gets stuck on, which is manual exposure. Justin Bridges, a New York fashion and lifestyle photographer, teaches the exposure triangle (aperture, shutter speed, ISO) as a single interlocking system rather than three separate settings, and that framing is the course's biggest strength. He is explicit that changing any one of the three throws off the other two, and he keeps returning to that idea through a classroom explanation, a studio demonstration, and three outdoor "deep dive" segments.
What the course actually teaches
The structure moves from theory to practice in a sensible arc. The opening lessons explain what happens mechanically when the shutter button is pressed (the mirror flips, light hits the sensor), then break down shutter speed as a fraction of a second, aperture as an f-stop controlling a lens opening, and ISO as sensor sensitivity Bridges bluntly calls "the weapon of last resort" because pushing it up trades brightness for visible noise. The specific numbers he gives are useful: 1/250 to 1/500 to freeze a walking person, 1/1000 or faster for a jogger or car, f/2.8 for a blurred portrait background, f/5.6 to f/11 for a sharp group shot. These are not vague gestures at "adjust your settings" but real starting points a beginner can dial in on their own camera that same day.
The studio demonstration, where Bridges shoots a spinning fan at different shutter speeds to show the blades freeze or blur, is the clearest teaching moment in the course because it removes any ambiguity about what a given shutter number actually produces. The three deep-dive segments that follow put the same ideas into a real city setting: shutter priority mode for panning a moving cyclist, aperture priority mode for a coffee cup portrait shot at 2.8 through to f/11, and an indoor ISO segment showing how noise creeps in as the number climbs from 400 to 1600.
Where it comes up short
The editing section is the weakest part of the course. It walks through a Lightroom pass on three photos, adjusting white balance, contrast, and clarity, and turning on lens correction and auto transform, but it never goes deeper than "click auto and nudge a slider," which will leave anyone hoping for an editing workflow wanting more. The bonus lesson on buying cameras and lenses is genuinely practical (a Canon Rebel body plus a 50mm f/1.8 prime as a cheap, high-quality starter combo), but it is gear advice, not technique, and it pads out a course that is already short.
At 79 minutes, this is a fast watch rather than a deep one, and the beginner label is accurate. Anyone who already shoots comfortably in manual mode will find nothing new here. But for someone who owns a DSLR and has never left auto mode, the direct link between exposure numbers and visible results, especially the fan demonstration and the outdoor shutter/aperture segments, makes the exposure triangle click faster than reading about it would.
The standout
The studio demonstration where a moving fan is shot at multiple shutter speeds live gives a direct, visible link between a number on the dial and the blur or sharpness it produces.
What you will learn
- How to read the exposure triangle and trade off shutter speed, aperture, and ISO against each other in real time
- How to freeze or blur motion by choosing a shutter speed range (1/250 to 1/2500 to freeze, 1/30 or slower to show blur)
- How aperture value controls depth of field, from a blurred-background portrait at f/2.8 to a sharp group shot at f/8-f/11
- Why ISO should be raised last, and what ranges keep digital noise under control on a modern DSLR
- How to choose a focus point for a portrait, a group, and a landscape using the one-third rule
- A basic Lightroom pass covering white balance, contrast, clarity, and lens correction on a RAW file
Best for: A brand-new DSLR owner who has only ever shot in auto mode and wants a fast, practical push into manual settings.
Skip it if: Anyone who already understands the exposure triangle and needs lighting, composition, or advanced editing technique instead.