
Double Exposure Effect in Adobe Photoshop - A Graphic Design for Lunch™ Class
Helen Bradley · Graphic Design for Lunch™
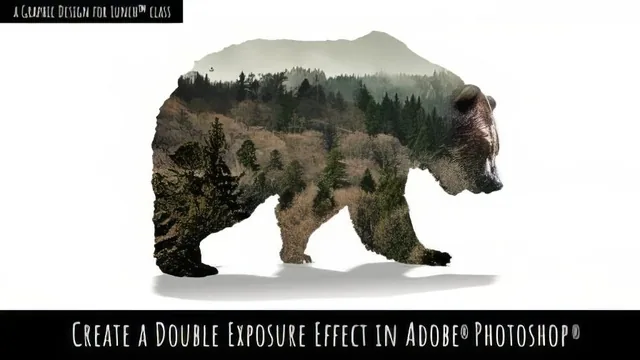
Twenty-two minutes teach one specific compositing trick well, but only if you already know Photoshop's basic tools cold.
What it actually covers
This is a narrow, technique-focused class built around a single finished image: a grizzly bear silhouette filled with a forest landscape, set against a color-matched snow background. The instructor works through the effect in four short parts rather than teaching double exposure as a general concept with multiple examples, so the entire course is really one extended demonstration with a project prompt tacked on at the end.
The build starts with subject isolation using the Quick Selection tool and Select and Mask (or Refine Edge on older versions), then moves into the actual double exposure step: duplicating a landscape layer, sending it into the bear document, and applying Layer > Create Clipping Mask so the tree image fills the silhouette. From there the class covers repositioning the clipped image with the Move tool, using Command/Control+0 to see resize handles, and holding Shift while scaling to keep proportions locked.
The shadow and blending sections carry the course
The most useful stretch is the shadow work. Rather than relying on a flat drop shadow, the instructor extracts it to its own layer via the fx panel's "Create Layer" option, then rotates, distorts, and warps it with Edit > Transform > Warp so it appears to originate correctly from the bear's feet. A gradient-filled layer mask softens the shadow's falloff so it fades with distance instead of reading as a uniform dark blob. This is a genuinely transferable technique that applies well beyond this one project.
The final part addresses a real weakness of the double exposure effect on its own: once a silhouette is filled entirely with a second image, the original subject's features disappear. The fix shown here, painting a duplicated subject layer back in through a mask using blend modes like Pin Light or Screen at reduced opacity, is a smart, practical adjustment that separates this from a purely mechanical clipping-mask tutorial. The class also touches on Match Color to blend a new background into the subject's palette and Levels adjustments, including the less commonly used output sliders, to redirect visual focus back onto the main subject.
Where it falls short
At 22 minutes across four parts, the pacing is brisk to the point of assuming prior fluency. Selections, masking, and blend mode switching are demonstrated at working speed with minimal pausing to explain why a setting matters, which suits someone who already has the muscle memory but will lose anyone still hunting for menu items. The course also leans on a favorable source image, an easily isolated bear shot mostly in profile, and says as much directly, which means the technique may prove harder to replicate on trickier subjects like human portraits with complex hair or busy backgrounds.
There is no discussion of alternate approaches, such as luminosity masking or gradient map methods, which are common in other double exposure tutorials. For a viewer wanting one specific, well-demonstrated recipe with a couple of genuinely useful side techniques, it delivers efficiently. For anyone wanting a fuller theoretical grounding in why double exposure effects work or how to adapt them to harder source images, it will feel thin.
The standout
Extracting the drop shadow effect to its own layer via the fx panel, then warping and masking it into a directional shadow, turns a generic filter into a controllable, realistic element.
What you will learn
- Isolating a subject from its background using the Quick Selection tool and Select and Mask
- Creating a clipping mask to fill a silhouette with a second image
- Building a custom drop shadow by extracting it to its own layer and warping it into place
- Blending a duplicated subject layer back in using blend modes and a painted layer mask
- Using Match Color and Levels to unify color and lighting between a subject and a new background
Best for: Intermediate Photoshop users who already know layers, masks and selections and want a specific compositing recipe rather than a beginner tutorial.
Skip it if: Photoshop beginners who have never used layer masks or clipping masks, since the class moves through those steps quickly without stopping to explain them.