
Digital Poster Design: Combining Images & Type for Powerful Visuals
Temi Coker · Digital Artist and Illustrator
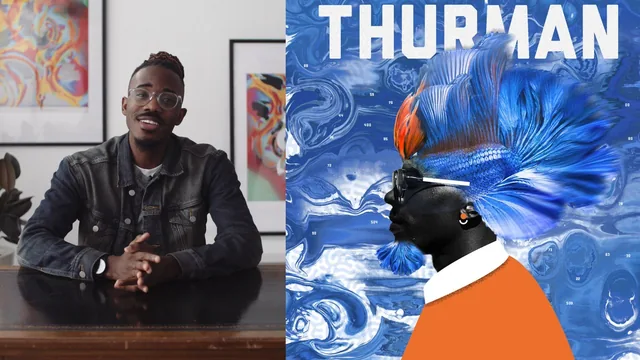
A working artist walks through his exact poster-making process, but expects you to already know your way around Photoshop's toolbar.
What the class actually covers
Temi Coker's class follows one project from start to finish: turn a portrait photograph into a layered digital poster by fusing it with an animal image and typography. The teaching arc mirrors his own process rather than a curriculum. He opens by isolating the subject with Select Subject and Select and Mask, then leans on the Refine Edge Brush to recover detail Photoshop's automatic edge detection misses, like beard hair or loose strands. That same isolation workflow gets repeated a lesson later on a betta fish image, which he then shrinks, reshapes, and blends onto his subject's head using a black-and-white adjustment layer clipped to just that element, plus a curves adjustment to match tone. It is a clean demonstration of how much control clipping masks give you over one layer without touching anything underneath.
The background section is where the class earns its keep. Coker teaches a technique he calls Reaction Diffusion: paint random white dots on a black canvas, then record a three-step Photoshop Action (High Pass at a low radius, a Threshold adjustment, a Gaussian Blur) and replay it dozens of times until the dots evolve into an organic, marbled texture. It is a slow, almost generative-art process, and watching the pattern change in real time is one of the more memorable moments in the class. He follows it with a displacement map, saving a texture-rich image as a PSD and routing it through Filter, Distort, Displace so the pattern wraps realistically around the subject's contours rather than sitting flat on top.
Where it gets looser
The middle stretch, covering hand-drawn clothing, custom shapes, earrings, and gradients, is presented more as "here is what I add for flair" than as a structured lesson. Coker redraws a shirt with the pen tool specifically so he has freedom to recolor it, and adds circular shape details that double as jewelry, but the reasoning is delivered conversationally rather than taught as a repeatable method. The Experimenting lesson is the most honest moment in the class: he tries a Wind filter, a Wave distortion, and a Motion Blur duplicate directly on camera, and openly discards two of the three because they do not suit this particular poster. That transparency is refreshing but it also means the lesson teaches you what these filters do more than when to use them.
Text integration is handled competently, layering type behind imagery, adding subtle drop shadows via a clipped black layer, and finishing with a light noise filter for texture, plus a scattered-numbers technique meant to reward viewers who look closely. The closing export lesson is genuinely practical, covering JPEG output for Instagram and a reusable print template built with the Frame Tool for consistent physical prints.
Who should take it
The class is billed for all skill levels, but that framing does not hold up. Tool names like Quick Selection, clipping masks, and adjustment layers are used at full speed with no definitions offered, and someone who has never opened Photoshop will lose the thread within the first ten minutes. For an intermediate user who already has the mechanics down, though, this is a good look at how a working designer actually thinks through a piece, especially the reaction-diffusion background and the displacement-map wrap, both of which are worth stealing for other projects entirely.
The standout
The reaction-diffusion background technique, built as a reusable Photoshop Action that loops High Pass, Threshold, and Gaussian Blur until an organic marbled pattern appears, is a genuinely transferable trick worth the price of admission on its own.
What you will learn
- Isolating a photographed subject cleanly with Select Subject, Select and Mask, and the Refine Edge Brush for tricky areas like hair and beards
- Building a custom textured background from scratch using a repeatable Photoshop Action (High Pass, Threshold, Gaussian Blur looped until a pattern emerges)
- Blending a second image, like an animal, into a portrait using layer masks, clipping masks, and black-and-white adjustment layers
- Applying a displacement map to wrap an outside texture around the contours of a subject
- Hand-drawing clothing and adding small graphic details (custom shapes, earrings, gradients) to open up more editing freedom
- Placing type behind or around imagery using layer order, shadows, and noise to make text feel integrated rather than pasted on
Best for: Photoshop users who already know their way around layers and masks and want to see a working artist's actual creative decision-making, not a button-by-button beginner tutorial.
Skip it if: Total beginners to Photoshop, since selection tools, masks, and adjustment layers are used at speed with the assumption you already recognize them.