
Digital Illustration: Learn to Use Procreate 5
Jarom Vogel · Digital Illustrator
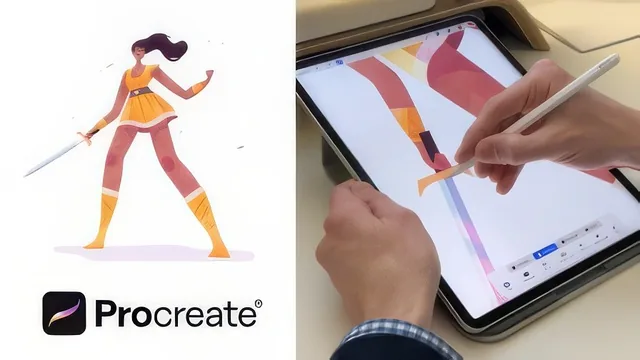
A working freelance illustrator walks through one real animated illustration in Procreate 5, but a lot of screen time goes to rambling asides rather than tight instruction.
What the course actually covers
This class builds one animated illustration of a woman in a dress from first thumbnail to final export, using it as a vehicle to demonstrate the features new to Procreate 5. The structure follows a real production pipeline: thumbnail sketching with QuickShape, transferring the sketch to a full-resolution canvas, blocking in flat color with the selection tool, layering shadows and highlights with blend modes, adding texture with custom brushes, and finally rigging a short loop with Animation Assist. Twelve short lessons carry this arc, most running only a few minutes, with the bulk of actual drawing time compressed into time-lapse segments while the narration explains decisions in real time on the parts that matter most.
The teaching value sits almost entirely in the technique explanations bookending each time-lapse. The gesture control setup in Part 1, covering QuickMenu customization, simplified undo, and the risk of accidentally merging layers through gesture shortcuts, is a genuinely useful primer for anyone new to Procreate 5's settings menu. The QuickShape section in Part 2 clearly demonstrates snapping to perfect squares, circles, and 15-degree line increments, a detail many tutorials skip. The color work is the strongest stretch of the course: the instructor walks through the color disk versus the Value tab, then spends real time on the Color Harmony wheel, showing how split-complementary and analogous modes generate a palette automatically from one chosen hue.
Where it delivers and where it thins out
The animation content, despite being the headline feature in the course title and blurb, gets comparatively light treatment. Animation Assist is introduced with onion skinning and the loop, ping-pong, and one-shot playback settings explained clearly enough to follow, but the actual frame-by-frame construction happens mostly off-screen in time-lapse, so a viewer sees the settings panel more than the decision-making process behind each frame. Anyone taking this course specifically to learn animation technique rather than illustration technique may come away wanting more.
The coloring and shading section is where the course earns its keep. Blocking in shapes with the freehand selection tool and filling with a textured brush at varying pressure to create gradient-like color variation is shown step by step, as is the shadow workflow using new multiply layers and manual curve adjustments to warm or cool a color without repainting it. The custom brush combination feature, where two brushes merge into a dual brush with adjustable blend interaction, is demonstrated but described even by the instructor as something he is not sure when he would actually use, which is an honest but slightly deflating moment for a course meant to showcase new tools.
Delivery is conversational to a fault. The instructor frequently interrupts himself, apologizes for his own sketches, and drifts into asides about iPad RAM or his drawing stand that add friendliness but little instructional density. Viewers who prefer a tightly scripted walkthrough will find the pacing loose. The final lesson on export settings and miscellaneous tips, covering drawing guides, symmetry modes, text tools, and blend modes applied directly to brushes, is a useful grab bag but arrives as a loosely connected list rather than an integrated part of the project.
Overall this works best as a session watched alongside an already-open Procreate canvas, pausing to try each feature as it appears, rather than a linear lecture to absorb passively. It rewards existing illustrators updating their Procreate knowledge more than newcomers hoping to learn digital painting from scratch.
The standout
The multiply-layer shadow and overlay-layer highlight workflow, where the same base color is sampled with the eyedropper and pushed through blend modes to build believable, textured lighting without repainting the shape.
What you will learn
- Setting up Procreate's gesture controls, QuickMenu, and workspace preferences for a faster workflow
- Using QuickShape and the edit handles to build clean thumbnail sketches from rough shapes
- Rigging a simple frame-by-frame animation with Animation Assist, onion skinning, and loop/ping-pong/one-shot playback modes
- Building color palettes with the color disk, Value sliders, and the Color Harmony wheel (complementary, analogous, triadic)
- Blocking in flat color with the selection tool then layering texture with multiply and overlay blend modes for shadows and highlights
- Combining two brushes into a dual brush and exporting a cropped time-lapse video
Best for: Someone who already sketches and paints digitally and wants to see an experienced illustrator's actual Procreate 5 workflow, warts and all, rather than a scripted feature tour.
Skip it if: Complete beginners to digital art or iPad drawing, since the course assumes comfort with layers, selections, and basic illustration concepts and spends little time on fundamentals.