
Create a Sci-Fi Space Loop in Cinema 4D and After Effects
Don Mupasi X Visualdon · Visual artist.
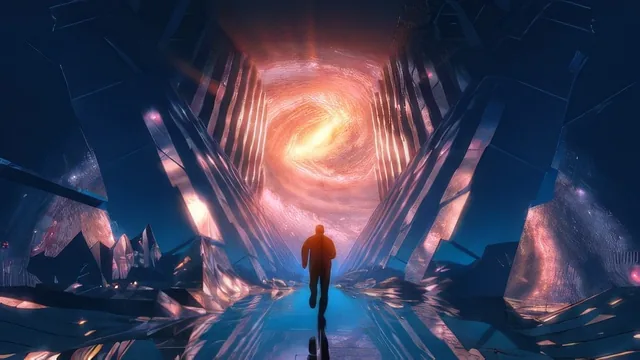
A specific, technique-rich walkthrough of one striking sci-fi loop, but the free character tool it depends on has been discontinued and never replaced.
This course walks through one artist's specific process for building a looping sci-fi animation, from a running astronaut figure to a field of glowing pillars beneath an alien galaxy. It is not a general Cinema 4D or After Effects primer. It is a recipe for one distinctive visual style, taught by someone who has clearly made a lot of pieces in that style, and the value is almost entirely in the specificity of the choices explained along the way.
Structure and technical depth
The class opens with practical housekeeping, recommending Cinema 4D versions R21 through R24 for closest compatibility and covering viewport navigation shortcuts, before moving into the actual build. The character pipeline starts in Mixamo, where a model is auto-rigged and given a run cycle, then brought into Cinema 4D and extended using a key frame trick: setting an "after" track to offset repeat so a one-second loop becomes a character running indefinitely across a precisely measured 5,000-centimeter stretch. That number becomes the backbone of the whole scene, since every other object gets built to match that same distance so the final loop closes cleanly.
The middle section covers building the pillar field with a Cloner and a Plain Effector driven by a falloff field, so pillars appear to rise out of the ground as the camera passes over them. This is explained twice, once for current versions of Cinema 4D and once as a bonus lesson for older versions that lack the newer fields system, which is a thoughtful accommodation given how differently the falloff tools work across versions.
Lighting and compositing
The lighting section is arguably the most interesting part of the course conceptually. Rather than placing lights in the scene, the entire look comes from reflectance settings, a galaxy image piped into a luminance channel, and a physical sky fog effect. A genuinely useful aside here covers a known Cinema 4D bug where fog fails to render correctly after reopening a saved project, and the workaround of animating the fog height by one unit on the first frame to force a reset, a detail that would otherwise cost someone hours of confusion.
The render setup, breaking the image into ambient, reflection, and atmosphere passes plus separate object buffers for masking, sets up a genuinely thorough compositing stage in After Effects. There, the course builds glow effects by duplicating and blurring masked layers, adds light rays with radial blur, and finishes with Lumetri color grading and export settings tuned separately for YouTube and Instagram.
Where it falls short
The most significant weakness is structural rather than instructional: the character creation stage originally relied on Adobe Fuse, which has since been discontinued, so learners are handed a pre-made rigged model instead of building one from scratch. Anyone hoping to create original characters this way is left without that piece of the workflow. The pacing also assumes comfort with layered materials, node-based shader stacking, and After Effects track mattes, so despite being labeled accessible to all levels, true beginners will likely struggle to keep up once the compositing chapters begin. What the course delivers well is transferability: the offset-repeat looping method, the falloff-driven reveal effect, and the reflection-only lighting approach are all techniques that extend cleanly beyond this one project.
The standout
The offset-repeat key frame technique for extending a one-second run cycle into a perfectly looping, ever-advancing character animation is the single most reusable trick in the class.
What you will learn
- Building a seamless looping animation using offset-repeat key frame tracks in Cinema 4D's timeline
- Rigging and animating a humanoid character with Mixamo, then extending a short run cycle into a long, matched loop
- Using a MoGraph Cloner with a Plain Effector and falloff field to reveal pillar structures as a camera passes
- Building a lit-only-by-reflection look with luminance materials, normal maps, and layered reflectance instead of real lights
- Setting up multi-pass renders (ambient, reflection, atmosphere, object buffers) in Cinema 4D for compositing control
- Reconstructing and grading the render in After Effects with track mattes, glow passes, and Lumetri color for final YouTube and Instagram export
Best for: Someone with basic Cinema 4D and After Effects fluency who wants a full pipeline for building one specific type of looping sci-fi scene, from rigged character to final export.
Skip it if: Complete beginners expecting a plug-and-play character pipeline, since Adobe Fuse is discontinued and the workaround adds friction the class was not built around.