
Cinema 4D - Looping 3D Animation for Instagram and GIF
Dave Bergin · CG Artist - CG Shortcuts
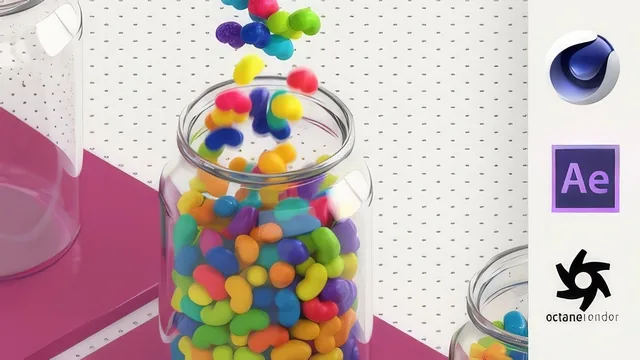
A dense, real-world walkthrough of a photoreal looping animation, but the pace assumes you already know Cinema 4D's basics cold.
What it actually covers
Dave Bergin's course builds one specific project, a "Jellybean Factory" loop, and uses it as a vehicle to move through nearly the entire Cinema 4D and After Effects pipeline. It opens with modeling: a glass jar built from a traced spline profile revolved with a Lathe object, and a jelly bean built by bending a capsule primitive with a Bend deformer until it reads as candy rather than a pill. Both objects get cloth-surface thickness and subdivision surfaces to go from blocky to smooth, with running commentary on why polygon count matters once dynamics get involved.
The middle stretch is where the course earns its keep. Beans are emitted, run along a Mograph conveyor, and dropped into the jar with rigid body dynamics, and the instructor walks through a genuinely messy, realistic debugging process, switching collision shapes from automatic to moving mesh to convex hull, raising simulation steps and solver iterations, and adjusting project scale to stop beans from exploding or clipping through geometry. This kind of honest problem solving is rare in a canned tutorial and is the strongest material in the course.
Lighting, texturing, and finishing
Lighting relies on Global Illumination plus a Sky object, first tinted with a flat material color, then swapped for an HDR image pulled from a free online source, with exposure tweaked to brighten the scene. Texturing covers physically based glass using an index-of-refraction value of 1.52 and absorption distance, plus a random-color shader setup for the beans. A bonus lesson repeats the material work inside Octane's node editor, useful only to viewers who own that renderer.
Rendering explains EXR output at 16-bit depth and render presets for balancing speed against quality, and compositing in After Effects covers importing an image sequence, matching frame rate and bit depth, and applying a LUT with a Lumetri Color adjustment layer for a filtered, Instagram-ready grade. A dedicated troubleshooting lesson at the end, covering cache corruption and jittery keyframes, is unusually thorough for a course this length.
Where it falls short
The course never actually teaches Cinema 4D from first principles. Snapping, viewport navigation, and tool locations are demonstrated but not explained, so anyone without prior modeling experience will be pausing constantly to look things up elsewhere. It also assumes access to both Cinema 4D and After Effects, and the Octane bonus content is a dead end without a paid renderer license. The compositing section, while useful, is thinner than the modeling and dynamics sections and treats color grading as a quick pass rather than a deep dive.
For someone who already has basic Cinema 4D fluency and wants to see how a polished, physically grounded loop gets built end to end, particularly the dynamics troubleshooting, this delivers real value in under two hours. For a true beginner hoping to learn the software itself, it will feel like being handed a finished recipe with half the technique explanations assumed rather than taught.
The standout
The dynamics troubleshooting sequence, where slow, wobbly jelly bean simulations get fixed step by step through collision shape choice, scene scale, and simulation caching, is the most transferable skill in the course.
What you will learn
- Modeling organic and hard-surface objects with splines, Lathe, and Bend deformers, matched to real-world scale
- Setting up rigid body dynamics with individual collision elements, moving-mesh vs convex hull tradeoffs, and Mograph caching to fix jitter and slippage
- Lighting a scene with Global Illumination, the Sky object, and HDR image maps for realistic bounce light
- Building physically accurate glass and randomized-color materials, including an Octane node-editor version
- Rendering an EXR image sequence and compositing it in After Effects with LUTs and color correction
- Looping and exporting the final animation for Instagram and GIF formats
Best for: Intermediate Cinema 4D users who already know basic navigation and modeling and want to see a full photoreal Mograph pipeline assembled end to end.
Skip it if: Cinema 4D beginners, since the course moves fast through UI navigation, keyboard shortcuts, and menu locations without pausing to explain fundamentals.