
Character Illustration and Design Mini-Series, Pt. 1 - Gesture, Silhouette, Form
Marco Bucci · Professional illustrator & teacher
Eighteen minutes of dense, professional-level drawing fundamentals that reward artists who already know their way around a pencil.
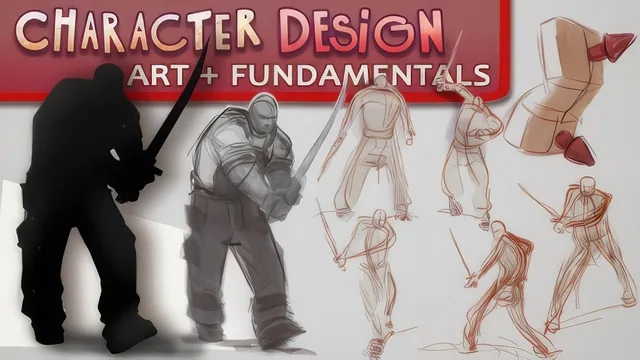
This is the first installment of a three-part series that walks through designing a semi-realistic character, in this case a burly, sword-carrying figure named Vladimir, from the ground up. At eighteen minutes, it covers three fundamentals in sequence: gesture, silhouette, and 3D form, treating each as a distinct stage of the drawing process rather than blending them together.
What the lesson actually covers
The gesture section opens with a piece of reference art, identifying the overall C curve running through the pose and the smaller secondary curves that echo it. From there the course shows repeated attempts at drawing Vladimir's gesture from imagination, trying an S curve, then straighter lines, then a twisted upper body, narrating why each attempt does or doesn't fit the character's personality. This trial and error is one of the more useful parts of the course, because it shows a professional rejecting his own work in real time and articulating exactly why a pose reads as athletic or theatrical instead of menacing.
The silhouette section takes the chosen gesture and fills it in as a flat black shape, then manipulates that shape directly, moving the head, adjusting the legs, and testing how folds of clothing and pocket shapes affect readability. A useful principle surfaces here about repetition: creating the same fold shape twice in a row and immediately catching it as a design flaw, since repeated shapes draw unwanted attention. The lesson also compares two silhouettes, one that clearly reads as a figure holding a mallet and one that buries that information inside the shape, to make the point that clarity at a glance should be the priority before any interior detail is added.
The final section moves into 3D form, starting with two boxes for the rib cage and pelvis to establish opposing tilts in the shoulder and hip lines, then adding cylinders for limbs and an egg-shaped rib cage to convey bulk. This flows into a genuinely detailed breakdown of forearm anatomy, naming the ulna, the lateral and medial epicondyles, and the extensor and flexor muscle groups, explaining how their twisting arrangement creates the forearm's characteristic bulging contours. A shorter segment on the head applies the same plane-based thinking, dividing the face into front and side planes using the temple and cheekbone as reference points.
Strengths and limitations
The course's strength is density paired with narration that explains reasoning, not just technique. Rather than showing a finished drawing, it shows failed attempts and explains what made them fail, which is more instructive than a polished walkthrough would be. The forearm anatomy segment in particular goes further than most character design tutorials bother to, naming specific bones and muscle groups.
The tradeoff is pace. Concepts arrive quickly and assume the viewer already understands terms like plane changes, construction lines, and axis alignment. There is no warmup for someone unfamiliar with figure drawing vocabulary, and the color and face design work is explicitly deferred to a later installment, leaving this part focused entirely on structure and form rather than a finished piece. As a first chapter in a longer series, it succeeds as a dense primer but is not a self-contained project.
The standout
The silhouette iteration process, where the artist duplicates a flattened gesture and reshapes it purely as a 2D read-at-a-glance puzzle before any interior detail exists.
What you will learn
- How to build a gesture drawing around a single dominant C curve and secondary rhythms that echo it
- How to iterate a silhouette by flattening a gesture into solid black shapes and testing readability at a glance
- How to avoid accidental repetition and visual noise inside a silhouette's negative space
- How to construct a figure from basic 3D forms: boxes for the rib cage and pelvis, cylinders for limbs, an egg shape for the ribcage volume
- How forearm anatomy works structurally, including the extensor and flexor muscle groups and where they originate
- How to separate the head into front and side planes using the temple and cheek as dividing landmarks
Best for: Intermediate to advanced illustrators who already draw regularly and want a professional's checklist for gesture, silhouette, and form before starting a character.
Skip it if: Absolute beginners with no drawing background, since the pace assumes fluency with anatomy terms, perspective, and construction drawing already.