
Blender 3. 0: Product Animation MasterClass
Smeaf · 3D Generalist and Tutorials
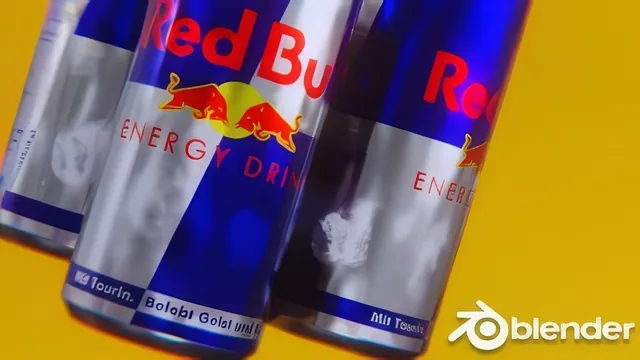
A single, fast-paced Red Bull can build teaches real product-animation workflow, but the pace assumes you can pause and rewind constantly.
This course compresses an entire product commercial pipeline, modeling, texturing, lighting, animation, rendering, compositing, and color grading, into under two hours built around a single project: a Red Bull can spot with four distinct shots. That scope is both the appeal and the strain. Anyone who finishes it will have touched every stage of a real production workflow, but each stage gets only enough time to demonstrate the moves, not to explain why they work.
The build itself
The modeling section is the most thorough part of the course. It starts from reference images loaded directly into the viewport, then builds the can body from a cylinder using loop cuts, edge bevels, and careful attention to the lip and base detailing that separates a passable can from a flat cylinder with a label. The lid gets separate treatment: extruding the pull tab from a second cylinder, using the knife tool to draw custom topology for the embossed lettering divot, and cleaning up shading artifacts with auto-smooth and a subdivision surface modifier. This is genuinely useful, transferable modeling knowledge, not just a can-specific trick. It shows a repeatable process for turning reference photos into clean hard-surface geometry.
The animation section shifts strategy in a way worth calling out. Rather than keyframing the can mesh directly, the course parents the joined can object to an empty cube and animates the empty instead, duplicating that empty-and-can pair to build multiple independently moving cans per shot. It is a smart, production-grade habit, and combined with an array modifier used to scatter a field of cans for the second shot, then applied and separated into individual objects so each can be rotated by hand, it demonstrates real problem-solving rather than rote keyframing. The graph editor gets touched only lightly, mostly to crunch easing curves and switch interpolation from Bezier to linear, so viewers hoping for a deep dive into animation curves will find only the basics.
Where it thins out
Lighting, rendering, and compositing move fast and lean heavily on trial and error rather than principle. Point and area lights get placed and their power values adjusted by eye, with commentary like "that's looking pretty good" standing in for any explanation of why a given intensity or radius was chosen. The compositing pass in Blender's node editor adds a lens distortion node for chromatic aberration, useful, but it is one technique presented without much context for when or why to reach for it. The DaVinci Resolve segment covering the final logo reveal, built from an inverted rectangle mask with keyframed position and softness, is clear and functional but brief, and the color grading pass is essentially a checklist of slider nudges rather than a lesson in color theory.
The course delivers on its promise of a complete, usable production loop for a single product shot, and the modeling and empty-parenting techniques are worth the time on their own. It is not a course for someone learning Blender's interface, hotkeys fly by with little pause for explanation, and it will frustrate viewers who need conceptual grounding for lighting and color decisions rather than a demonstration to copy.
The standout
The empty-object parenting technique, where all animation keyframes drive a stand-in cube instead of the mesh directly, giving each shot independent, non-destructive motion control.
What you will learn
- Hard-surface modeling a beverage can from reference images using loop cuts, bevels, and a subdivision surface modifier
- UV unwrapping and texturing a product mesh for realistic materials
- Three-point-style studio lighting with point and area lights against a reflective backdrop
- Parenting geometry to empty objects to drive multi-shot keyframe animation, including array modifiers for repeated props
- Basic compositing with lens distortion nodes and multi-shot color grading in DaVinci Resolve
- Building a rectangular reveal mask with keyframed softness to expose a logo and tagline
Best for: Someone who already knows Blender's interface basics and wants a compressed, hands-on template for building a full product commercial from model to color grade.
Skip it if: Absolute beginners who need each hotkey and menu explained, since the teacher moves through navigation and modeling steps quickly and assumes familiarity with the software.