
Animation for Illustration: Creating Layered GIFs with Photoshop & After Effects
Abbey Lossing · Illustrator
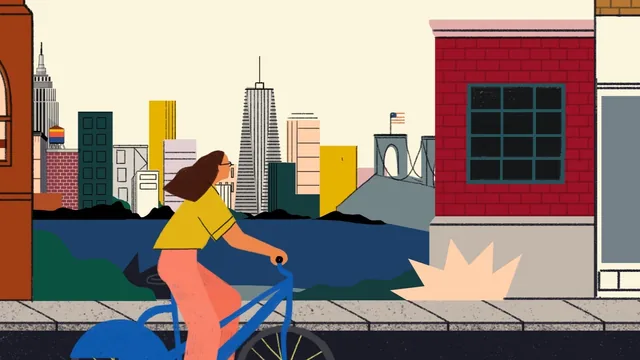
A working illustrator walks you through her exact Photoshop-to-After-Effects pipeline for one looping character GIF, not animation theory in general.
Abbey Lossing teaches from experience rather than theory. She's a Brooklyn-based illustrator and GIF maker who has worked with The New York Times, Google, and Target, and this class is built entirely around one repeatable pipeline she actually uses: sketch, color comp, animate the character in Photoshop, finish the background, then assemble and time everything in After Effects.
The project is a girl pedaling a bike through an urban scene, and the choice is deliberate. Lossing explains early that pedaling is easier to animate convincingly than a walk cycle, since the torso barely moves, which is a useful piece of practical judgment for anyone picking their own project. That kind of scoping advice, choosing character actions that minimize animation work while still reading as dynamic, shows up throughout and is more valuable than the software steps themselves.
The Photoshop half carries the class
The strongest material is the character animation lesson, which walks through Photoshop's video layers and Onion Skin feature in real detail. Lossing sketches a wireframe guide first, then animates the leg and hair separately, checking that each loops cleanly by comparing the last frame against the first. Her fix for a jumpy loop, adding intermediate frames until the motion stops jerking, is shown rather than just described. The boil technique for static elements like the shirt and bike frame, where three near-identical frames are drawn and cycled, is the single most transferable idea in the course. It's a simple trick that instantly reads as more alive than a flat, unmoving layer sitting next to animated ones.
The color comp lesson is also worth singling out. Rather than jumping straight to final art, Lossing builds a rough, loosely painted version of the whole scene first, dragging the character layer across different backgrounds to test contrast before committing to final colors. She catches a real problem this way, a building color that was too close to the character's skin tone, and fixes it before it costs her hours of redone linework. It's a habit any illustrator could lift directly into unrelated projects.
After Effects gets thinner treatment
The After Effects portion is the weakest link. It covers building precomps for each PNG sequence, dragging them into a master composition, and setting position keyframes so background layers move at different speeds to create parallax, closer layers faster, distant ones slower. That's a legitimate technique, and the parallax depth cue does add production value. But the lesson only really touches keyframing position and trimming composition length. Anyone expecting exposure to easing, expressions, or After Effects' broader animation toolkit will find the class stops well short of that.
The pacing also assumes comfort with Photoshop fundamentals. Lossing moves quickly through file setup, layer grouping, and export settings without dwelling on basics, so a true beginner to digital illustration will likely need to pause often or look up terminology elsewhere. For an intermediate illustrator who already thinks in layers and just wants a faster, better route from static art to looping motion, though, the pipeline taught here is complete, specific, and immediately usable.
The standout
The boil technique, redrawing a static element three times and looping those frames so parts of the character that aren't animating still feel alive, is the kind of detail that separates amateur GIFs from professional ones.
What you will learn
- Building a long sketch canvas and planning a looping parallax background across two or three depth layers
- Using Photoshop video layers and Onion Skin to hand-draw frame-by-frame character animation
- Creating a rough color comp first so palette and contrast decisions are locked before final art
- Adding secondary motion (boils) to static elements like a shirt or bike frame so nothing looks frozen
- Exporting PNG sequences with straight alpha and assembling them as precomps in After Effects
- Timing parallax background layers at different speeds and looping them seamlessly for export
Best for: Illustrators who already draw comfortably in Photoshop and want a repeatable, professional workflow for turning a still illustration into a looping character GIF.
Skip it if: Complete beginners to animation principles or anyone hoping for a broad survey of After Effects, since the AE portion is limited to positioning layers and precomps rather than its animation toolset.