
A Beginner's Guide to Digital Painting in Adobe Photoshop
Gabrielle Brickey · Portrait Artist - ArtworkbyGabrielle.com
A tight 38-minute primer that gets a total beginner from tablet setup to a finished colored sketch, nothing more, nothing less.
A software walkthrough, not a painting lesson
This class promises digital painting for absolute beginners, but what it actually delivers is a Photoshop mechanics tour, aimed at someone who already draws. The opening two lessons spend real time on hardware. Gabrielle Brickey compares her Wacom Intuos models, recommends programming tablet express keys to a bigger brush, a smaller brush, undo, and redo, and walks through binding the pen's side button to the eyedropper tool via the Alt+Left (or Option+Left on Mac) modifier. It is practical, specific advice, and it saves a new user from fumbling with a stylus for weeks. But it also means the class spends a chunk of its short runtime on setup before anything resembling painting begins.
Once inside Photoshop, the course settles into its actual subject: taking a scanned pencil sketch and turning it into a finished colored piece. The workspace lesson covers docking the Navigator, Color, History, and Layers panels and bumping the History States preference to 400 so long painting sessions stay undoable. The canvas and brush lesson recommends a 9x12 canvas at 300 pixels per inch, explains installing downloaded brush sets, and shows how to enable pen pressure sensitivity through the Transfer settings in the Brush panel, opacity jitter and flow jitter both set to Pen Pressure. None of this is advanced, but it is the exact kind of small, easy-to-miss setting that trips up someone opening Photoshop for the first time.
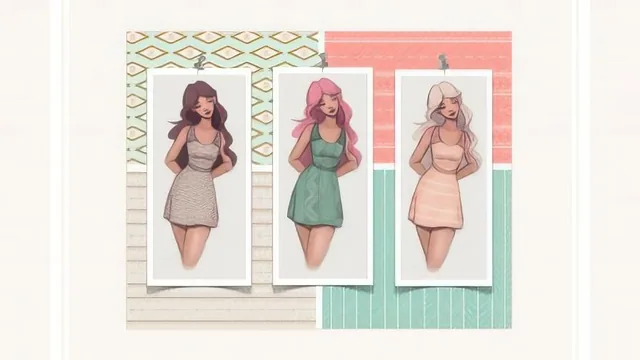
The four numbered tutorials are the heart of the class and the strongest material in it. Tutorial 1 walks through fixing a scanned sketch: rotating a wrongly oriented scan, straightening a crooked one with the rectangular marquee and move tools, converting to grayscale and back to RGB, then brightening the paper with Levels and Color Range selection before erasing stray specks with the Patch tool. Tutorial 2 is the coloring method that gives the class its clearest payoff: duplicating the sketch layer, setting its blend mode to Multiply so linework becomes see-through like a coloring book page, then painting flat color on separate named layers underneath and adding shading via clipping masks so brush strokes never escape the lines. Tutorial 3 covers dropping texture and pattern files onto clothing and backgrounds using clipping masks and blending-mode experimentation, plus hand-painted sparkle effects with the Dodge tool. Tutorial 4 is the shortest, covering horizontal flip as a proportion-check trick and the Liquefy filter's forward warp tool.
The class project asks students to sketch a favorite character or animal and run it through these same steps, with the teacher's own sketches offered as a fallback for anyone without one ready. That is a sensible, low-pressure assignment that mirrors exactly what the tutorials demonstrate, so nobody finishes confused about what to do next.
What the course does not do is teach painting itself. There is no discussion of light and shadow theory, color harmony beyond a pointer to the teacher's separate color workshop, brush control, or rendering technique. It is a tool tutorial dressed as a painting class, and it succeeds at that narrower goal. For someone who can already draw and just needs to stop being intimidated by Photoshop's interface, the 38 minutes are efficient and well-organized. For someone hoping to learn how to actually paint digitally, this is only the on-ramp.
The standout
The Multiply-blend-mode-plus-clipping-mask coloring method turns a messy sketch into a clean, editable coloring-book setup in minutes.
What you will learn
- Setting up a drawing tablet's express keys and pen button (eyedropper shortcut) for a faster workflow
- Building a custom Photoshop painting workspace with Navigator, Color, History, and Layers panels
- Cleaning up a scanned sketch using Levels, Color Range selection, and the Patch tool
- Coloring line art with the Multiply blending mode and clipping masks to stay inside the lines
- Adding texture and pattern overlays to clothing and backgrounds using blending modes and opacity
- Adjusting proportions with the Liquefy filter and horizontal flip for a fresh-eye check
Best for: A traditional artist who already sketches on paper and wants the shortest possible path to coloring that sketch digitally in Photoshop.
Skip it if: Anyone who already knows Photoshop's basics, works primarily on iPad/Procreate, or wants painting technique (brushwork, rendering, anatomy) rather than software mechanics.