
5 Minute Creativity: Making Watercolor Blooms
Cat Coquillette · Artist + Entrepreneur + Educator
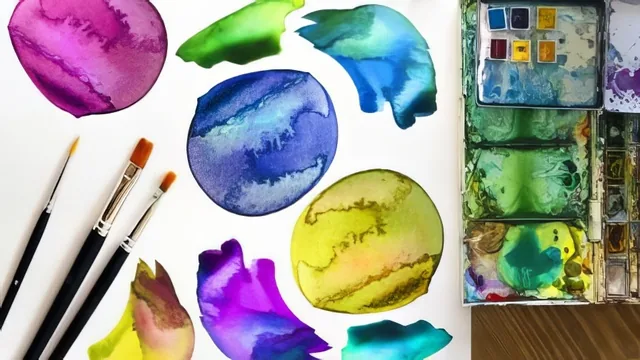
A three-minute demo of one wet-on-wet trick, useful only as a quick preview before buying the full class.
What it actually covers
This class runs a single idea for its entire three minutes: the watercolor bloom, the flowery, irregular stain that forms when wet pigment is pushed toward the edges of a drying pool. Cat Coquillette treats it as a technique most traditional painters try to avoid, then flips that convention by showing how to produce it on purpose. The demonstration is straightforward. A patch of purple is flooded with extra water until it visibly pools and spreads, then more pigment and a touch of blue are dropped in while the water is still active. The class closes by comparing the wet, undefined stage to the finished, dried result, where the crinkled, hard-edged bloom pattern has fully formed.
There is no separate instructional arc here, no warm-up exercise, no discussion of paper type or paint-to-water ratio, and no second technique layered on top. What the course delivers is one worked example, narrated in real time, of cause and effect: excess water plus excess pigment, left alone to dry, produces the bloom. That is the entire lesson.
Where it succeeds and where it thins out
The strongest moment is the before-and-after comparison. Watching the same wet pool that looked shapeless a minute earlier resolve into a sharply defined, crinkled boundary makes the physical mechanism click in a way that a photo of a finished bloom never could. Coquillette also makes a useful editorial point in passing: blooms are usually associated with loose, abstract backgrounds, but she prefers using them inside tight, controlled shapes, which is a more interesting and less obvious application than the technique typically gets credit for.
The trade-off is depth. Nothing is said about how much water is too much, how to keep a bloom contained within a specific shape rather than letting it spread unpredictably, or how to time the second color addition relative to the first. Viewers are shown a result but not given the control variables that separate a lucky accident from a repeatable outcome. Because the class is explicitly a condensed preview of a longer version, this thinness reads less like a flaw and more like a design choice, but it does mean the video functions as a demonstration rather than an actual lesson.
Bottom line
As a three-minute sample, this earns its place. It answers the single question "what does an intentional watercolor bloom look like and roughly how is it made" clearly and quickly, and the drying-process comparison alone makes it worth the runtime for a curious viewer. It is not a substitute for instruction, though. Anyone who wants to control bloom size, timing, or placement, or who has never painted with watercolor before, will need the fuller class this one is built to advertise.
The standout
Deliberately overloading a small area with water and pigment, then letting it dry undisturbed, is the one repeatable move the course actually demonstrates.
What you will learn
- How to force a watercolor bloom by flooding an area with excess water and pigment
- Why blooms form: drying water pushes pigment outward into irregular, crisp-edged shapes
- How to layer a second color (blue over green) into a wet pool for overlapping bloom boundaries
- Where blooms read best: tight, controlled shapes rather than loose abstract backgrounds
- How to recognize when a bloom is developing versus when it has finished drying
Best for: Someone who already paints with watercolor and wants a fast visual reminder of how to trigger a bloom on purpose.
Skip it if: Beginners with no watercolor experience, or anyone wanting paper prep, brush, or paint-ratio guidance, since none of that is addressed.